Thursday 31 March 2011

File sharing with Windows7 to Atari TT030

OK. Hi. So thanks to some people from Atari Forum for this. Some might advise you to but the Netusbee card, and if you are serious about browsing the net and using LAN then this would be well worth it.

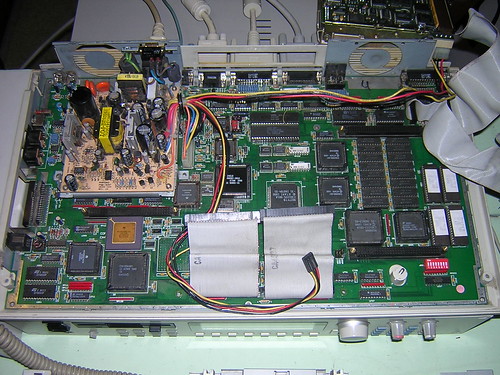
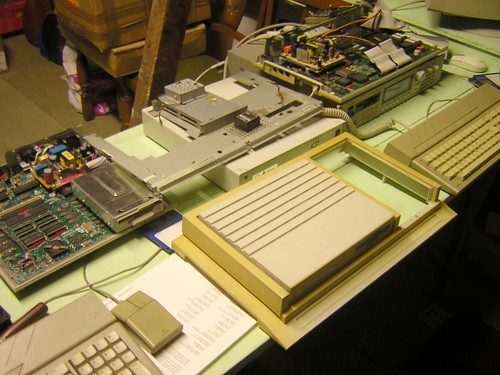
I have got a basic TT also, and I have only had it for over a month, and have had to do some extensive repairs to get it going. 

Personally, I am going to try the same thing next, and I have what I think is the cheapest (and no doubt slowest) way to do it. I am sure that if you are serious there are better ways. But hey, its Retro!

I am just about to try the SERIAL route, using null-modem, as I want to learn about the computer, and I also know that I have got a good connection. So I want to experemnet.

So far, I have hooked a "null modem cable" to my Windows7 PC and I have attached the other end to Serial 2 of the TT to create the link. The null modem cable is easy to get and cost me about £2. I have seen them in computer shops this year going for less than a fiver. This is all you need to network to the Windows7 PC, but please bear in mind that it is very slow connection, and much much less capable than either a network card or netusbee. 

Anyway. So there are two reasons I want this:-
Q1. To transfer large files to the TT from Windows7
Q2. To network drives
Q3. To try out (slow) internet connection through ICS (internet connection sharing)
- Years ago I used to use a "proxy server" on the PC end to give internet to other machines

Anyways, I only started yesterday, and I have had success from Point 1!! :D 
A1. I can now transfer files, and this works great!! Its made it so much easier to get files on my machine and also proves the COMMS porst works and allows me to test the settings and speed. Seems to work well at 115200 bps (I have no idea what this is in kB per second?) but its about fastest port can do, which is still about 6 times faster than an old skool 19200 bps internet connection so what do you want (are we retro or what!?)

How to do it!
I first needed to get the serial ports on the TT working well. The build in COMMS driver in GEM is crap, so you need HSMODEM07 ( its herehttp://gem.win.co.nz/hall/pages/files2.html#fixes ) 

Next put the files DRIVIN, DRIVINGSA, ESCC and MFP_TT (TTT serial port driver ) in your AUTO folder. This adds HDMODEM routines to TOS, and this gives much more speed and modern drivers to your serial ports. Also, please be aware that the TT sports four serial ports MODEM1, MODEM2, SERIAL1 and SERIAL2 which all can run at different speeds.

Step 2, is to add a new CPX module to XCONTROL panel. The Ataris basic MODEM.CPX is too basic and only allows slower speeds, so you must replace this with SERIAL.CPX. This CPX is great!!! I used it yesterday, to tweak my comms ports and it is so wonderful and easy to use! 

My SERIAL.CPX setup (perhaps someone can improve?)
- I connected the null modem cable to SERIAL2 on the back of the TT
- I set SERIAL.CPX to 'Ser.2/LAN' and then selected '115200 bps' (try lower if dont work). Also I set 'Flow CTRL' setting to 'RTS/CTS' although it did work with default, I thought that this would make it quicker and more reliable. (although all data is CRC checked anyway!!!)
- Next in SERIAL.CPX select the 'Driver' tab for Ser.2/Lan and set send and recieve buffers to 256. Again, this improves speed for me. Make sure DTR is highlighed, and this is the best connection I found. Should work for all serial port comms to PC now!

Step 3. Now this is just how I decided to transfer files. I know this is an easy method, and I have only been at this yesterday so far, and I am planning on learning how to use everything, but heres how you do it. I needed to use a program on my Windows7 PC called HyperModem, this is easy to find on Windows XP and you can also run it on Windows7 ( I have put a copy of it herehttp://www.thebigconsultant.com/atari/hyperterminal.zip ) and its sooooooo easy! Just run it, and select 'New Connection', then its asks you for speed and COM Port. Mine is on COM1, and I tried all speeds, finding 115200 bps was fastest I could get. Then on HyperTerminal click 'Transfer' menu and 'Send File' 

Step 4. On the Atari end, so simple. I made a folder anywhere on my TT and put these files inhttp://www.thebigconsultant.com/atari/ZMODEM.zip which is a small command line proggy to send and receive files via modem. Simply run RZ.TTP and type in -rz in the 'Parameters' box and the file on the PC magically appears on your TT! Yay! I have been using this to get LOADS of software onto TT, and will also use it to backup my C Partition very soon. So now I know my COM1 works.

Q2. To network drives

I have not yet had time to do this. So I thought I would share with you. There is are at least 2 popular ways:-
1. To use GhostLink
2. To use BNET

Ghostlink will not work for me, and I suspect Windows7 is the culprit. So I am going to try and set up network drives with it. Looks more professional anyway, and I can probably set up a "Multi Atari LAN" system quite easily, with my TT, MEGA ST and STe... coool! :D 

All would share with up to 8 remote machines. The BNET software is well written, and has, like STING hypertexxt documentation for use with ST-Guide. So is easy to set up, even reading instructions on your Atari, using ST-Guide Desk Accessory and the setup instructions. I am doing this next, as will be nice to have a drag and drop network.

Q3. To try out (slow) internet connection through ICS (internet connection sharing)
- Years ago I used to use a "proxy server" on the PC end to give internet to other machines

This one is to set up CAB or a similar browser. Again I have not done this yet, but I know for a fact that it is possible, and pretty well documented to do this using NULL MODEM to PC. To do this you already now have HMODEM07 which is needed for reliable and fast(er) connection. You also need to set up and test the Serial or Modem port you choose (bear in mind some are slower) and get software onto your TT.

To use internet with SERIAL interface over NULL MODEM cable, you will need STING. STING is the TCP/IP stack that the Atari internet browsers like CAD and Highwire lock onto. I have not used these yet, as I have only just go my Atari, but it looks quite well documented on the internet. You need to forward a 'shared connection' e.g. 192.168.0.2 on your PC and also set an IP Address on your Atari TT, say 192.168.0.3

To do this STING has some AUTO folder files, and four CPX modules. Again, they look excellent. Actually simpler than Windows networking options. So using these, you set your internet domain, and IP settings to PC over SERIAL2 and you are away. The Atari software all seems to like STING, and you can then use internet, FTP, or instant messaging as well. Pretty cool. :) 

As I say, I am going to enjoy doing this. Especially as I am tight with the brass. I can have my "power without the price" internet, LAN, messenger, and file sharing for less than a fivers worth of null modem cable and a glorious venerable old machine. :cheers: 

Networking to Windows 7

My next job success is to stop using the floppy drive. See below. Yes it was great in its day. But I hate swapping floppy disks. Even if you can mod the 720kb dive to 1.44MB


Unfortunately my TT030 is a very early one, and you can see this by the "Atari 32 MEG Daughter Board / PGA". No idea what PGA means?!


So I did do a floppy drive mod to make it 1.44MB. You can see the solder wite bridge added here, and I had to short two pins on the floppy drive. 


The instructions are:-

Grab a Mitsumi D359T6 floppy drive from a PC to use it on an Atari (ST/TT/Falcon). The Mitsumi drive is the cheapest and most widespread floppy drive used nowadays in most OEM, brandless and homebuilt PCs. 

To change the drive ID, this unit has no jumpers, however, on the connector PCB you'll find a small area with 3 rows of 4 tiny solderpads. You have to make 2 solder bridges, like this (viewed with the connector 
to the bottom and the front of the drive facing up) - see the bottom circled red area on the picture above!

o o o o 
o o=o o 
o o o=o 

With this, the drive will be detected by the Atari, but you may experience problems with the Media change: when you swap disks, the Atari can ignore the swap, and writes to the new disk using FAT 
information of the old disk. This usually corrupts all the data on the disk, and makes it unrecoverable. 

The enable the media change detect, you can solder together 2 pins of the write protect/media change switch (top left of the drive, marked WP and MC). Bridge the MC and middle pins like this: 
|_____| 
W | | | M 
P | |=| C 

To ensure that it reads as HD, then you'll find that pin 2 of the mitsumi connector does not output +5V when a HD disk is inserted, as it should. A way around this, is to run a wire directly from the HD detect switch 
to pin 2 of the connector. The HD switch is the one opposite to the WP/MC switch, and has a pin marked HD. You should solder one end of the wire to this pin, and the other to the connector PCB, where the pin 2 is 
soldered to the board. 

I suspect that the HD detect and Media Change settings can probably be changed from the "4x3 solderpads" area, but I was unable to find a way to do so. Maybe someone else has some better information. 

Some of this information was from "The Atari ST Quick FAQ" by Nick Bales and was very useful!

Finally to modify the drive button on the replacement drive with a diamond one like the Atari.


So a bit of tinkering with a square file and you are done. Replace the drive and you have 1.44MB, and as luck would have it, the Atari TT formats to MS-DOS compatible disks (ish).

Next Ghostlink!
Success. The Compact Flash drive works. And I am copying files from the older SCSI drives using the external ACSI drive, that contains an ICD AdSCSI adaptor to the CF Card on the TT.


The TT is surprisingly fast at copying files, and well equipped with multiple I/O connections for various types of hard drive and add ons. The SCSI controller built in can run at 4MB per second, so that is a lot of data moving very quickly. Not bad for 1991, and good even now i think. I wish Windows was this quick, and at you can see the GEM 3.01 operating system, that is built into Rom on the screen. Start up to this screen from switched off is less than 3 seconds!! Very impressive. I now have 3 drive icons, and also two programmes installed on the desktop. I'll unhook the external drive when I am done, and put into storage or for use with the Mega ST. I may even retrofit the AsSCSI card in the drive into the Mega ST computer internally, so it has similar capabilities. 

Starting to get there though!

Compact Flash Hard Drive

So now it is time to change the internal hard drive to compact flash. I have a 4GB card and some fun items.


- A 4GB Compact Flash,
- An ACard AEC7720U SCSI-to-IDE converter (but you can use I-O Data IDSC21-E from ebay too)
- A 68pin to 50pin SCSI converter (the TT uses 50 pin SCSI-2 standard ribbon cable internally)
- Two Molex 4 pin power to floppy power connectors, and not shown a Molex Y Power Splitter


All readily available from your local PC shop, apart from the ACard or IO Data SCSI Converters, but you can find them on eBay!


So now to assemble for putting into the Atari TT


Here we are. A new solid state SCSI hard drive perfect for my 1991 supercomputer made by Atari. Lets slip it into the drive bay.


First add some PCB standoffs.


Then lets fix it into the Hard Drive Caddy.


Nice. Now I can re-assemble the machine and fire up the hard drive partitioning tools. I has trouble using HDDRIVER which is the most recommended product, and I paid £40 for this.

In fact I had best success with ICD Pro hard drive tools, which although is no longer updated (unlike HDDRIVER) I found worked very well indeed. I may go back and try HDDRIVER in the future, especially as I wish to add some Fat32 windows partitions as well as the old Atari partitions, so that I can transfer files to and from PC by taking out the card. But I will try, and document this later. For now ICD Pro tools works well, and I believe that this is recommended for the UltraSatan SD Card reader too. But, my friends, this is cheaper and I could also add another 7 SCSI devices internally if I can fit them including

- CD Drive
- ZIP Drive
- More hard drives
- SCSI network card
- SCSI Card Reader

So I will also find a 4 way SCSI internal ribbon cable sometime, and see about adding extra internal devices. For now this will do, while I learn to use the machine! 4GB should be ok for now!
Ok, so the fan is TOO noisy. So here is a smaller and quieter replacement. Normal ones are 40mm x 12v, so replacing with same, but thinner. Also with a speed controller to reduce noise further.


The noise is caused mainly by the proximity of the fan to the slats on the TT and Mega Ste. These ones will not be so close so will not cause the same rush of air, but should be plenty good enough to cool the CPU. Note the gap, which is going to help make the machine quiet again.


So now, I am going to add a fan speed controller for a PC's CPU. This will allow me to control and lower the fan noise to suit and make the machine really quiet. I am putting the fan controller under the hard drive caddy, so that I can access this, and the Compact Flash card when fitted. Also any other mods. Its quite a handy and cool machine, and easy to get to parts to modify. This is the fan controller module before fitting and testing speeds.


And this is the final placement. Now to re-assemble the machine!


There all done. The machine is much much quieter, just like the old Atari STe was and now ideal for a studio environment. Might have been quiet back in the day too, as this machine has had a hard life for 20 years or so in a factory. But now will be feeling better, and certainly it is quieter than a PC. Next a Compact Flash hard drive.


More soon. The item to the right of the TT is an old Ladbroke Computing 40MB External Hard Drive. I need to get this info, and from the internal one onto Compact Flash, and thus the machine will be even faster, higher capacity and quiet as a mouse. Solid state computing from Atari!! Nice


Monday 21 March 2011

The gubbins bits

DSCN2485 by thebigconsultant
DSCN2485 a photo by thebigconsultant on Flickr.

One more geeky pic, and that's it for now...

This is the cleaned up motherboard. I have now replaced some, but not all, of the metal shielding. Certainly on the PSU for saftey, and also as the fan is required to cool the PSU on this model. I tried it without for a couple of mins and it gets HOT unlike the old STe, which is totally silent.

Its a bit annoying that the fans on this machine, are VERY loud. I decided that the hard drive fan (on the right) is not currently required, and I have ordered for about £2 some ultra quiet ones from our friends in China. 20 year old fans are not good! As a matter of fact, neither is a 20 year old hard drive. The Atari is fine, and boots from ROM into its 512k operating system, but I need to replace the drive with something that is perhaps less used mechanically for data safety, that plus it sounds like a jet engine. Options are CF Card, ZIP Drive or newer (less used) SCSI drive with a higher capacity. I have archived the old software from it and will post it up later. Ta for now

Some industrial alcohol and many cotton buds later! (",)

DSCN2499 by thebigconsultant
DSCN2499 a photo by thebigconsultant on Flickr.


This is what cotton ear buds, and isopropyl alcohol can do for you. That is if you decide to try and restore a 20 year old plastic 32bit super computer made by a company made famous for games consoles. Unfortunately I did not find an Atari ATW Transputer workstation, but the next best thing... A stock Atari TT030 workstation, 32bit Motorolla 68030 CPU with MC68881 math co-processor and a Mega ST4 side by side. Also in the heap... An external whopping 40MB Ladbroke Computing hard drive (under metal shielding in centre) and a plotter (more on this later!!!). The MEGA ST has been used mainly for CAD (Computer Aided Design) with an Atari SM124 hi res monitor attached, and the external drive powering the plotter and as you can see, both have been subject to my screwdriver. The TT case should be light gray, but I will deal with this with some home made oxidising agent later on. First to get it running and see what this baby can do... Oh, i forgot to mention, under the TT, an Akai s2800 hardware sampler. Like the one used by The Prodigy!

So this is what it looked like when I got it!!


Hmmm. A bit of a dirty machine!! Been stuck in a factory powering a CNC machine. A factory run by Atari's, I hear you say? Yes indeedy (",)

But its a bit bloody dirty. When I turned it on, the fans (2 in back) were wedged tight with muck and its like that stuff you get in your belly button, but much more compact. Some sticky bits too!

2GB Barracuda ST32550W SCSI hard disk

image by thebigconsultant
image a photo by thebigconsultant on Flickr.


This will replace the old 40MB hard disk (thats enough room for 40 floppy disks) with a whopping 2Gigabyte of storage!!

Funnily enough, the original drive from 1991 would have cost easily £1000 alone for a 40MB drive back in the day! (",)

The whopping 2GB unit is from a Sun SparcStation, and cost me around £10. This will provide ideal storage capacity and more than enough for a system where software is not "bloated" like modern windows software and programs are often written in assembly or pure C, i.e. An entire OS (Operating System) that can run a windowed filing system and SCSI hard disks, graphics and applications that is less than 256k in size!! (note that is one four thousanth of a Gigabyte. And windows typically takes up to 20 Gigabytes of space up on your hard disk!!)

This SCSI drive was good enough for Sun, so it should be good enough in a 1991 super computer made by Atari

Connecting a new SCSI hard drive

image by thebigconsultant
image a photo by thebigconsultant on Flickr.

I just picked up some COOL hardware!

I found at a client I worked for a old MEGA ST4 computer, and could not resist also picking up an Atari TT 030 workstation.

These are beautiful old machines, and I used to use an Atari STe happily for may years. I intend to refurbish these machines, and put them to use, in a fabulous music studio of yesteryear. I have no doubt that these machines will be IDEAL for making current music and sounds, as they are still (some say) the best in the business, and I intend to find out what Fatboy Slim, The Orb, Moby, Queen, and all those old bands from the late 80's and 90's were raving about. Yeah they used this shizzle, and I've got an Akai S2800 to boot, which is going to pile out some crazy sounds once this lot is up and running again!!